
I’ve had numerous requests over the past couple of months to explain how to create a toner transfer and offer insight onto the applications of this technique in mixed media work. I’ve compiled some information to share on the topic and hope that this helps address some of the questions that have been asked.

First off, what is a toner transfer?
A toner transfer is the transfer of an image printed with toner ink from one surface to another with the use of a medium that soaks up the toner from the print and adheres it to the secondary surface.
What is toner? How is toner different than ink-jet ink?
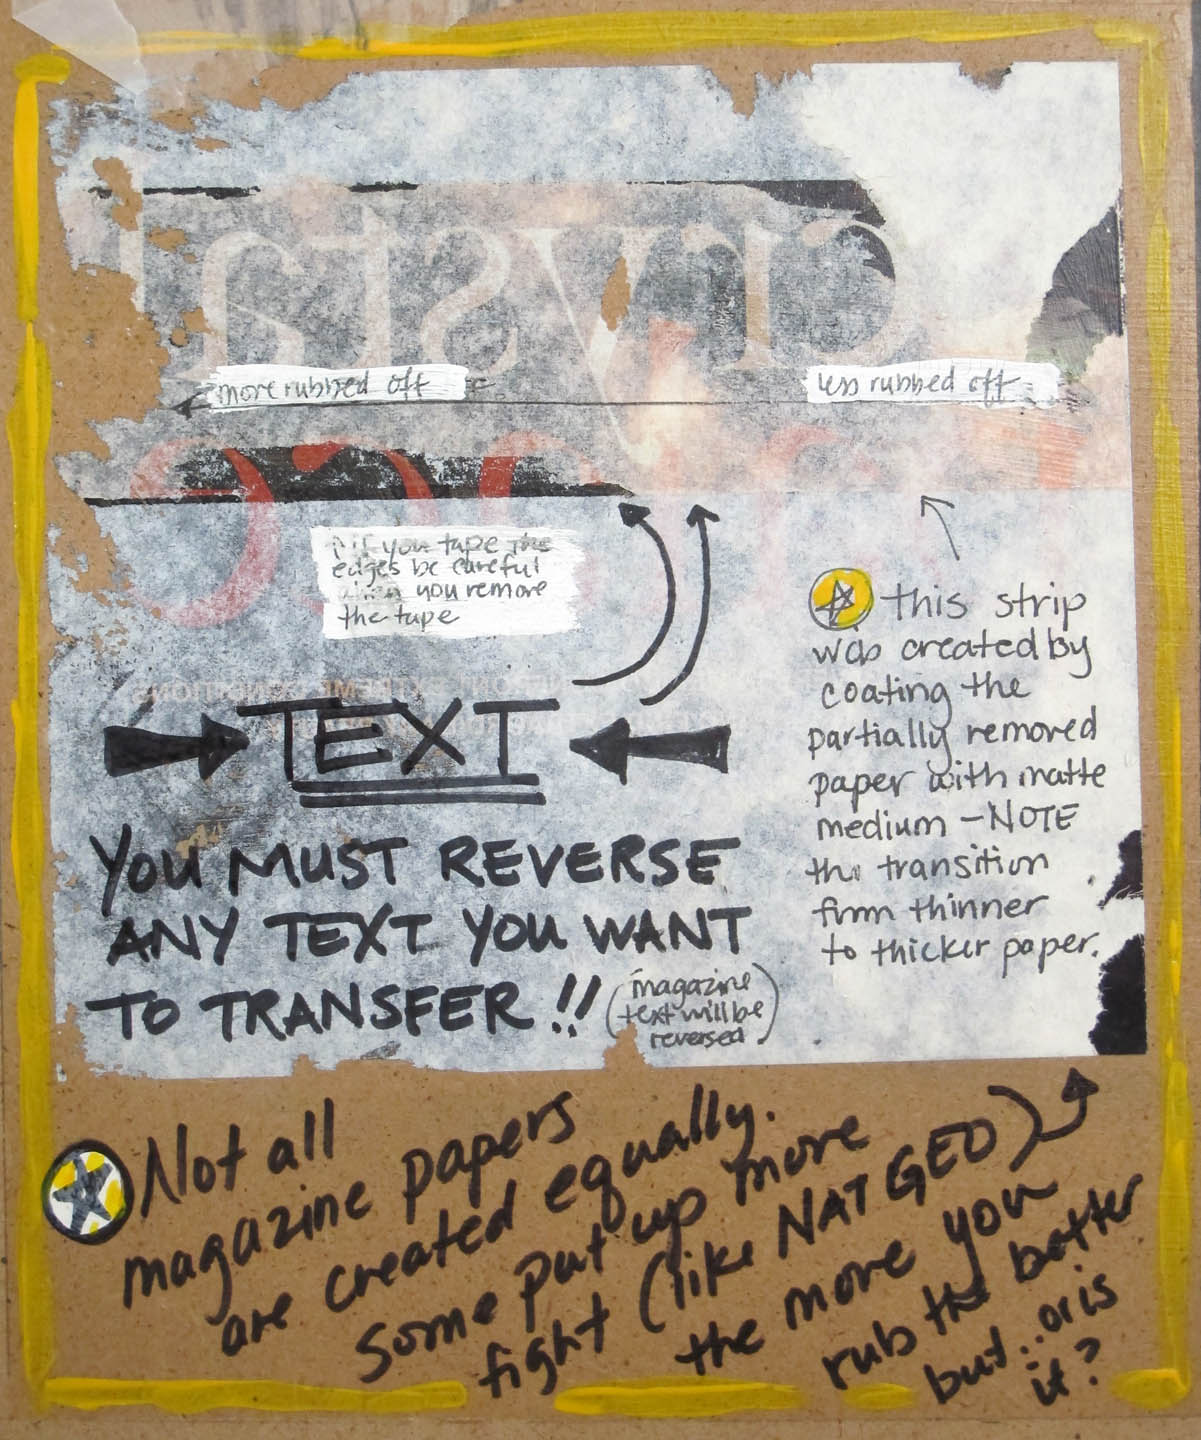
The key component in a toner transfer is toner… Toner is essentially ink but it’s uniquely different from the type of ink (or at least the printing process) used in our home printers. Toner is made of carbon powder, iron oxide, and sugar but when it’s printed, it’s heat fused to the surface of a paper with a bit of polymer (plastic) goodness. That’s why a toner print made on a Xerox copier or toner printer is hot when it comes out. Ink-jet printers do not use toner and do not heat-set the ink to the page. This very thing is part of what makes the toner transfer process work so only using toner copies is an absolute must. The good thing is, you’re not limited to black toner copies. Color copies work too! This provides an extensive array of possibilities. In addition, many magazines are also printed with toner (specifically the more coated types of magazines, not the paper/rag variety) and can be transferred as well. Magazines put up a bit more of a fight (especially really heavy pages like Nat Geo or Veranda, etc.) but they can produce some really awesome unpredictable effects.
Do you need expensive materials to create a toner transfer?
No! Toner transfers can be made inexpensively. You can make a toner transfer with a Xerox copy, a cheep foam brush (which is very important), and some matte medium. Xerox copies or toner print outs can be made at any copy shop so there’s no need to purchase a toner printer for your home.
Acrylic Matte Medium is essentially gesso without the addition of white paint. There are few differences between ModPodge and most commercially available matte mediums aside from price – ModPodge is the cheaper alternative. An 8 oz container of Golden soft-bodied acrylic matte medium is generally around $9-10 bucks while an 8 oz container of ModPodge is $4-5. Many artists have strong preferences one way or the other as to which brand of matte medium they use or whether or not they would advocate the use of ModPodge as there may be minor differences in viscosity, color when dried, and stickiness. Experiment and determine which you like best.

What surfaces are conducive to the toner transfer technique?
Any image printed with toner can be transferred to another surface like paper, panel/wood, fabric, plastics, or vinyl using acrylic matte medium. It’s important to keep in mind that if a surface is too slick the medium doesn’t always adhere well. If a surface is too flimsy or delicate, the process of creating a toner transfer may rip the surface. My advice is try it and then respond appropriately – if the surface is too slick, sand it a bit to rough it up then try again. If the surface is too delicate by itself, back it with something sturdier and try again. The image to the right was created on Yupo paper, a synthetic polymer “paper” that is very slick but also very absorbent.
And finally, how do you create a toner transfer?
You can adhere your magazine clipping or toner copy to your working surface in one of two ways:
- You can spread the acrylic medium directly onto your surface and then lay your clipping FACE DOWN on the surface where you want the toner transfer to occur or…
- You can brush your medium onto the front of your clipping and then lay it FACE DOWN on the surface.
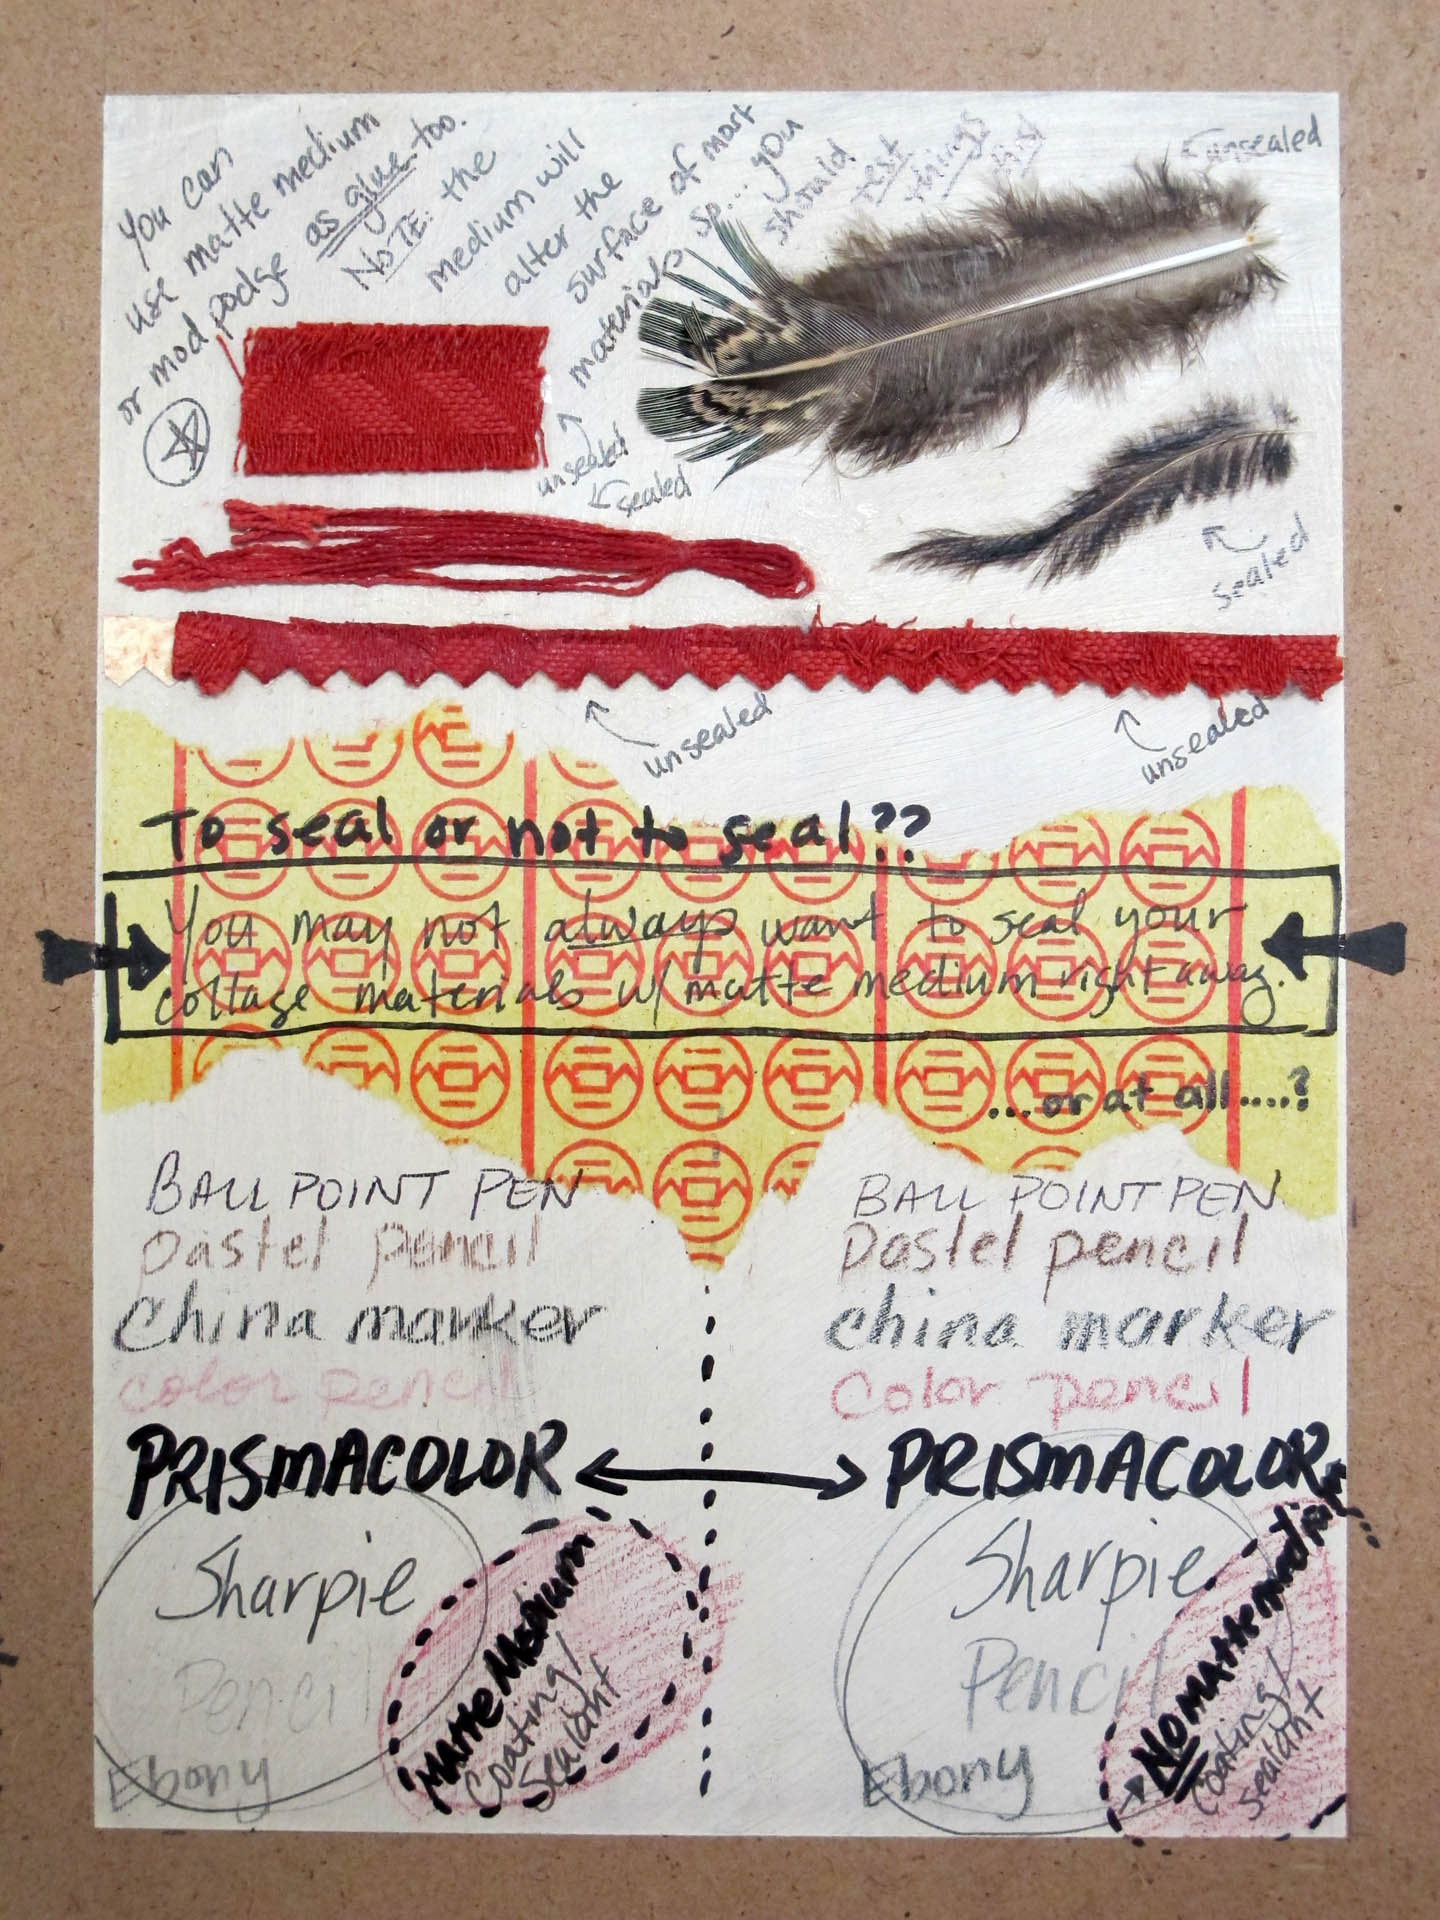
NOTE: Acrylic medium changes the surface of whatever it coats so if you want your image to act independent of the surrounding surface (like a sticker) then coating the front of the clipping may be more productive then laying the medium down first. The shape of the paper will also be visible so if you’re cutting around an image or text, keep in mind that this shape will be subtly present in your finished piece.
- Make sure to smooth out any air bubbles and ensure that the entire surface is completely adhered together. If you spread your medium too thin (or it dries before your image is laid down) you will see brush strokes and you may have areas where the toner doesn’t transfer completely (or at all).
- DO NOT seal down the piece of paper or magazine clipping by coating the back of the image you just laid down with medium- this will collage your image to the surface up-side-down!
- Allow everything to dry completely! This can be deceptive because it may seem dry on the surface but it may not be dry all the way down to the bottom. This process takes longer when transferring to paper or fabric than panel because of the absorbent nature of the materials. If your medium wasn’t too thick or your area wasn’t very big it could be dry in less than an hour but it’s better to wait an hour or more. I frequently wait overnight – to make this seem more productive, I work on multiple pieces at a time.
- When completely dry, wet the back of the paper and rub all of the moist fibers away to reveal the transferred toner to the now dried medium which is adhered to your surface. For the crispest results rub until no fibers are left – be careful! You can rub away the medium if you rub too hard, especially if you’re transferring to a non-porous surface or if your medium was applied very thinly. You can achieve some interesting effects by partially rubbing areas and then sealing them with medium – the medium will make the paper more transparent, revealing more of the image below the surface and intensifying the color and opacity of the image.
- Once your image is completely revealed (or you’re satisfied with what you see) you can choose to seal – or not to seal – the image. If you want to create additional transfers over the surface, it’s best to go ahead and seal it down evenly – you can immediately lay another toner copy into this sealed layer to maximize your time.
Here are some photographic examples and references that will help explain some basic concepts to keep in mind, as well as demonstrate just a few of the interesting effects and applications of this technique:


Here are a couple of additional works in which I’ve used toner transfers:
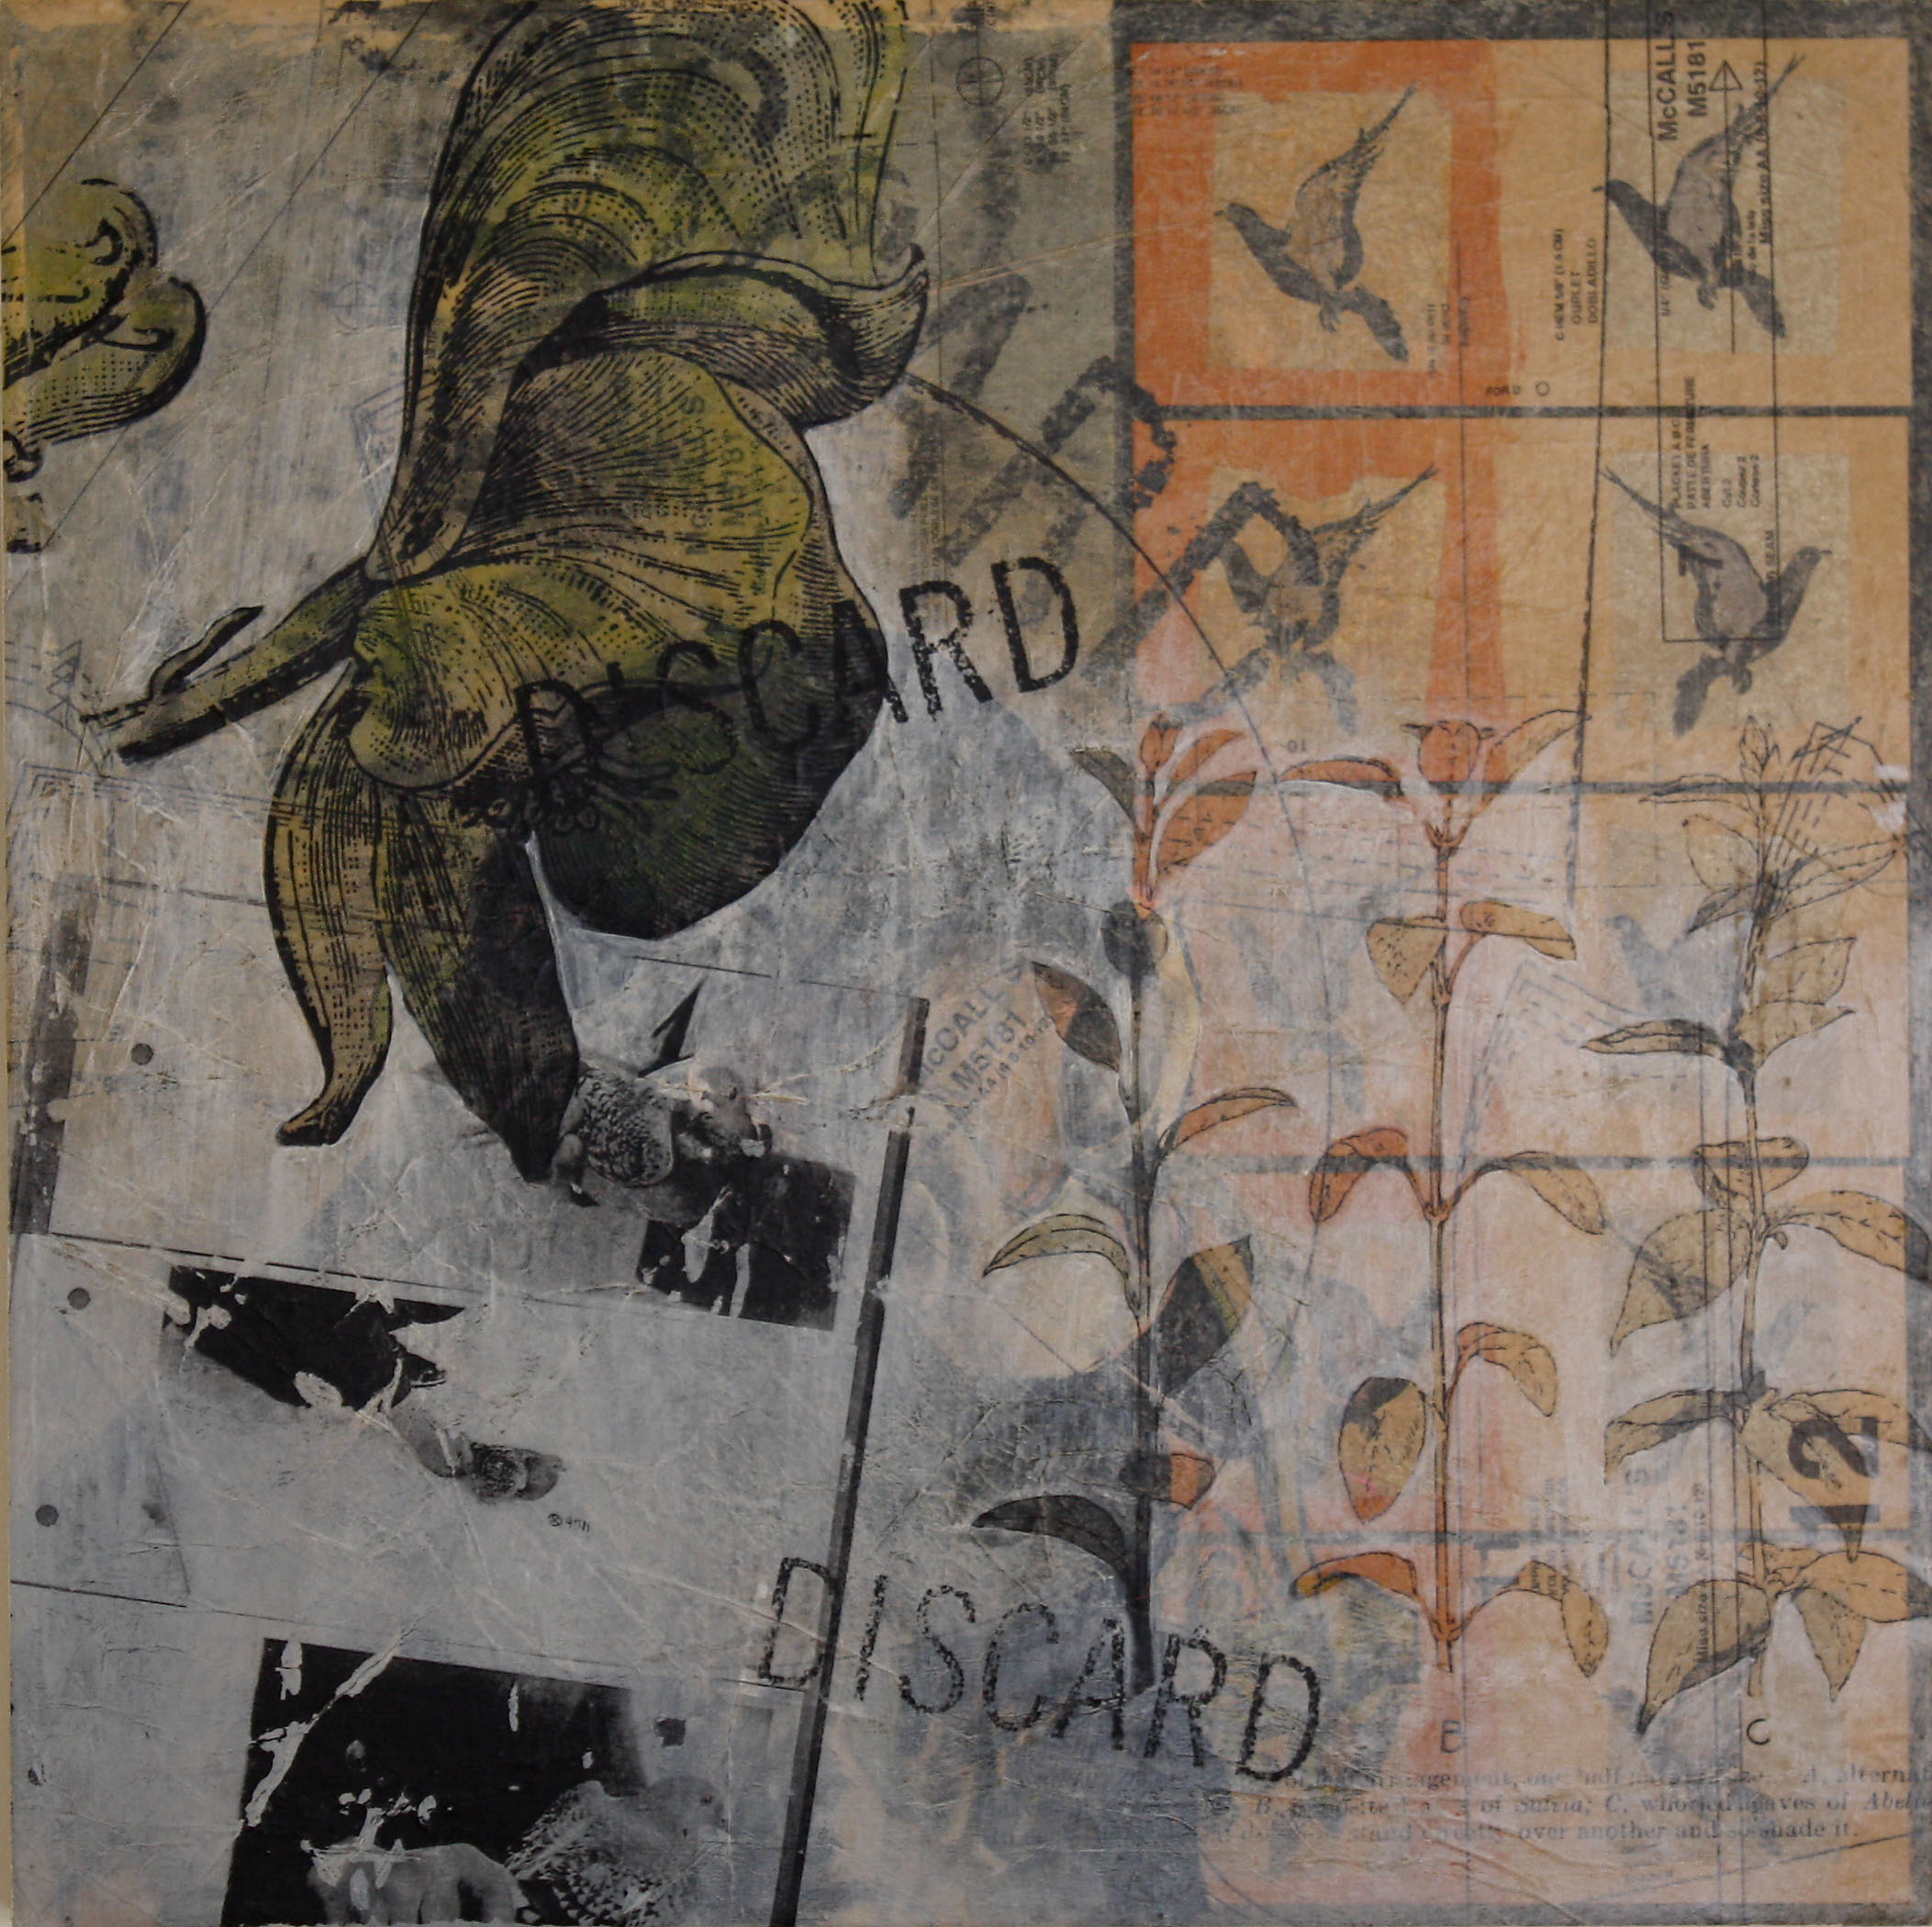
In Evaluate, I used joss paper (orange and tan boxes to the right of composition) as a collage material and then layered photocopies of imagery and words on top. I intermittently applied additionally glazes of white acrylic paint and at some point applied a layer of dressmakers pattern tissue.
In Vessels, I started from a black background and transferred color photocopies on the right (the couple in bed seen from above) and copies of my own sketches (top left) in layers. I’ve used the dressmakers paper again here. The areas that are white were painted first, before I laid down a toner transfer, so that the black ink would show up. I simply laid my cut photocopy down where I would later transfer it and traced the shape. I then painted inside my traced lines with white to create a higher contrast when the transfer was applied.

As with many of my how-to or experiment posts, I’ve created a PDF handout to compliment this post for anyone who is interested – all you have to do is email me and request the “Toner Transfer Handout”.

Hi Megan. Great info about toner transferring and the use of other mediums. You said you have a PDF handout – Toner Transfer Handout – if we email you. I didn’t see where to email you so I’m hoping this works in receiving a copy of the handout. Thanks again for the time you’ve taken to experiment.
Hi Shannon, I somehow missed your comment! I’m so sorry! If you’re still interested email me at me@meganlevacy.com and I’ll be happy to send you the info. 😁
fabulous.
It is a nice article about TONER TRANSFER SECRETS. I agree with all your points that you have stated here, love this blog.
Thanks so much, hope it helped in your own explorations.
Such a great information. This is really very helpful for bloggers. https://www.additiveinn.com/