Oh the lowly underappreciated dandelion.. so inconspicuously scattered everywhere… and edible! Seriously. My child has dandelion radar – she can spot them from a moving car (and yet cannot seem to find things I point to 3 feet from her). She has gifted me with many a tiny bouquet of yellow gems and I have grown to adore and appreciate these little plants dearly.

The best part is that much of the dandelion plant is edible! I know! I was a bit dubious about this too. After all, they are “vile weeds” that many people spend a ton of money trying to get rid of in their yard. Thankfully, I like a wild yard – much to the chagrin of my husband and neighbors – and think weeds make a prettier and successful lawn cover than most grass. So we certainly have plenty of these little buggers to work with.

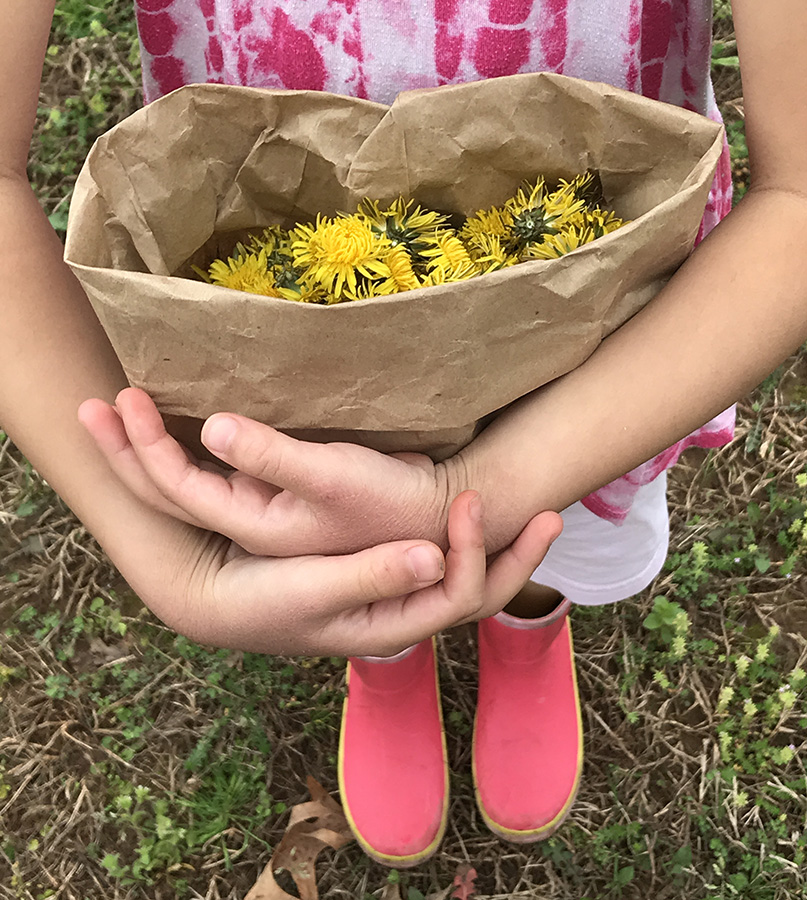
Leenie Hobbie is a family member who is even more granola-y than me (said with the most admiration and love as she is someone who lives a life I aspire to live) – she has a really amazing connection to the earth and runs a website about Neo-Traditional Herbalism. Leenie made some dandelion jelly awhile back. My mom recently brought this to my attention and then I could not shake the idea from my brain. So, I enlisted the help of my tiny human and we collected around 4 cups full (enough for 1/2 the recipe) of bright beautiful dandelion blooms to make our own sweet nectar.

We did not pick them from our yard, however, as we have a dog. You want the flowers you pick to be in a good “untouched” location well away from the road (exhaust fumes) and animals. We went to a nearby field that is part of the local wildlife park area and went nuts. When we were satisfied with our haul we went home and I began the long process of separating the petals from the green bract that holds them all in place.

To gather 2 cups of just petals I needed around 3.5 – 4 cups of complete blossoms. The process was made easier by cutting each blossom in half and then using my thumb nail to gently scoop the petals from the bract. The bract will supposedly make your jelly bitter if you include too many of them but a few missed pieces here and there will not harm anything according to many sources.

I was nervous about beginning the jelly. I had never made anything like this before and it was my first time canning something. I read a lot about safety precautions and how to not kill my family with mishandled canned goods (lets not mess with botulism, okay). I learned about the different types of canning and acidity level of foods – apparently not all canning is the same. Turns out that high-acid foods like jelly are ideal for the simpler and cheaper method of canning that only requires boiling. This was a relief as I am not prepared for pressure canning yet.
I was able to obtain a copy of the dandelion recipe used to make those inspirational jars (and given permission to share it with you) and after some quick math I decided to make half the recipe – it ended up making 3.5 half-pints so this seemed perfect for my small family.

The recipe asks you to boil the petals in water and then mix the “tea” made from this with pectin, sugar, lemon, and some vanilla. I did take the easy way out and used vanilla extract and already prepared lemon juice (and it seemed to work just fine). I have listed both the original and my halved recipe (with my lazier substitutions) at the end of the post.

It took the better part of an afternoon to make the jelly and I fretted over it all evening – worrying that it was not setting right, would not make a seal, etc. In the end it was all for nothing because it was freaking delicious (and it did set and seal)! It tastes a lot like honey.

My daughter would eat it on pretty much anything she likes it so much. We have tried it on toast, biscuits, pancakes, and with peanut butter and it is a total win each time. I think that having a hand in the making of the jelly really made the little invested in this stuff. We are both pretty proud of it. I find myself wanting to text various family members every time I eat it to remind them of the fact that I made this stuff.
This was an excellent learning opportunity for my girl cub. We explored different facts about dandelions, other uses and history of the plant, and the botanical names of the plant parts. With cooking we were able to discuss mathematical measurements, the chemistry of pectin and sugar, and the use of heat and sealing jars to preserve a fruit or veggies. Next we plan to create dandelion dye and make art with the flowers as well. We will use fresh flowers and leaves to make monoprints and give a good refresh to some old white clothes with a bright yellow dye bath.
During this period of social distancing and the need (i.e. societal pressure) to somewhat home school our kiddos (or at the very least keep them from going feral) projects like this can span days and connect your child to nature (and you) in a way that organically integrates learning in a subversive way. Your kids will unlikely realize that you are actively teaching them anything because the experience is unlike the traditional learning experience they are used to but they will almost certainly remember making “weed jelly” (lol) with you.
My kid really thrives on activities like this and I enjoy this time together with her. I would love doing it on my own anyway, but it is always better when I share an activity like this with my little love.
I hope that you will consider making this jelly this summer – you will not regret it if you like the taste of honey, I promise. Some personal advice? Consider making the full recipe… our jars are disappearing fast (especially because I gave one to a neighbor) and we are already planning to make more… it goes faster than you think… It is really that good.

LEENIE’S DANDELION JELLY
(she drew this cute jar too!)
Ingredients
(Whole Recipe – 7-8 half-pint jars)
- 1 quart (4 cups) dandelion petals (separated from bract), lightly packed
- 1 lemon (can substitute with purchased lemon juice)
- 1 vanilla bean (can substitute with 7-8 tsp vanilla extract)
- 5.5 cups sugar
- 1 package (2.75 oz) dry pectin
(Half Recipe – 3-4 half-pint jars)
- 1/2 quart (2 cups) dandelion petals (separated from bract), lightly packed
- 1 lemon (can substitute with purchased lemon juice)
- 1/2 vanilla bean (can substitute with 3-4 tsp vanilla extract)
- 2.25 cups sugar
- 1/2 package (2.75 oz) dry pectin
Canning Supplies
- clean sterilized canning jars with rings and *new* lids
- canning pot with lid (NOT pressure canner) or large stock pot with depth to cover cans and rack with about 1″ of water
- rack or other metal rack to keep jars from bottom of pot
- tongs or tool to remove hot jars from water
- 2 stainless steel pots (one with a high edge)
- clean towel
- cooking funnel
- cheese cloth, coffee filter, or other straining fabric
- patience
Time Expected? I would not advise you to try this for the first time ever if you do not have the whole afternoon free. I would suggest that you make an entire day of it regardless and begin picking flowers after breakfast and have all the petals done and ready to go for the canning portion before you make lunch. Do the canning in the slower part of the afternoon and then you will have jelly ready to go the next morning, eliminating too long of a build-up if you have impatient or younger kiddos.
Directions (Whole / Half Measurements)
Gather (7-8 cups / 3-4 cups) dandelion blossoms from a clean source. Avoid flowers growing near roads as the exhaust from cars is dangerous. Avoid areas where pets are to avoid further contamination. Separate the petals (yellow part) from the bract (green part) until you have (4 cups / 2 cups) of lightly packed petals. Leenie says a few bracts will not hurt your jelly but too many will make it bitter so try your best to get rid of as many as you can. I found that cutting the blossoms in half made it a lot easier (and faster) to do this. Stick your thumbnail against the inside of the bottom and then pull the petals out.
At this point it is a good idea to measure the required water height in your canning pot and get it boiling at this point. Many people sterilize their jars by boiling them for 10 minutes and then leave the water boiling for the canning process later. Either way, you’ll want the water to be boiling by the time this next step is done and you find yourself needing to put your filled jelly jars back in the pot.
Next, place all your petals into a stainless steel pot with (4 quarts or 16 cups) / 2 quarts or 8 cups) water and simmer (do not boil) for 10 minutes. Remove from heat and then strain into a bowl. Take (3 cups / 1.5 cups) of this dandelion “tea” liquid and put into a clean deep pot (trust me on the height – it needs some depth!).
To the tea, add (2 tbsp / 1 tbsp) lemon juice and (if using a real lemon) the zest of the (whole / half) lemon, and a split (whole / half) vanilla bean or (7-8 tsp / 3-4 tsp) vanilla extract, and (1 full / 1 half) package dry pectin. Bring to a rolling boil – stir the entire time! The mixture will get foamy and rise up your pot even with constant stirring – do not let it burn. Remove from heat and, if you used a vanilla bean, remove the pod.
Fill sterilized jelly jars until about 1/4 inch from top (this is important for proper seal so avoid underfilling) with your funnel (or, like me – just be very careful and use a spoon) and then wipe the lids with a clean cloth. Place the hot sterile rings and new lids on the tops of each jar. Tighten to only a finger-tight level – do not over tighten as the jars will need to allow air to release during the canning process. You just want them tight enough that water will not get in.
If you have a jar that is less than full just put the lid on and stick in fridge at this point. You do not need to put it in the canner – just eat it first.
Process in boiling bath for 10 minutes. When done, carefully remove each jar and wipe outside dry. Place on a towel (this is actually important) to cool. DO NOT DISTURB them for 12-24 hours while they sit and seal (this is harder than it seems). Do not tighten the lids. The jars will cool and then you will hear a pop when they finally seal later (but still resist fiddling with them).
The next morning test the seals. If they do not seal you can still salvage them. If the jelly does not set you can still fix it. Look instructions up online… the jelly process is kind of forgiving so trouble shoot your issues before throwing anything away.
We made Bisquick biscuits to eat with jelly the first morning – they are quick and easy even on a school morning. Recently we made vegan sweet potato biscuits from scratch and they were heavenly with the jelly as well. My daughter likes them on pancakes the best and it is a good alternative to syrup if you do not like it or want it. We chopped up bananas to go on top – so yummy!
Enjoy!!!

1 comment