
As previous posts have suggested, I’m getting into home dying. While my primary interest is in eco-dying and eco-printing – that is, dying and making prints with natural materials – I thought it would be a good idea to start simple (and non-toxic) with some basic kitchen-witchery. In turning my attention to basic everyday kitchen items I’m able to learn more about the technical side of dying before I start working with limited quantity or seasonal items I’ve collected from my urban and wild environment.

To begin, I combed Pinterest for a variety of inspirational recipes from the awesome creative artists and that have come before me. There are great examples of success with many items I have in the house all the time: avocados (both the skins and pits), blackberries, blueberries, pomegranate, cabbage, spinach, turmeric, black beans, teas, etc. I also found a couple of books on Amazon that are amazing, specifically “Wild Color”* which gives a lot of great information about the science of dying with an emphasis on natural materials (not really a kitchen focus, though).
Essentially, the process for making a home dye is not that different than cooking – you prep your materials (in this case both your dye stuff and what you want to dye), bring your dye stuff just to a boil in enough water to cover it and then let it simmer for 30 minutes to an hour on low then strain off the bits and use the concentrated liquid left either as is or with added water to dye something else. It’s so simple and there are so many ways to vary the dyes that you’ll collect quite a few jars in no time if you’re not careful.

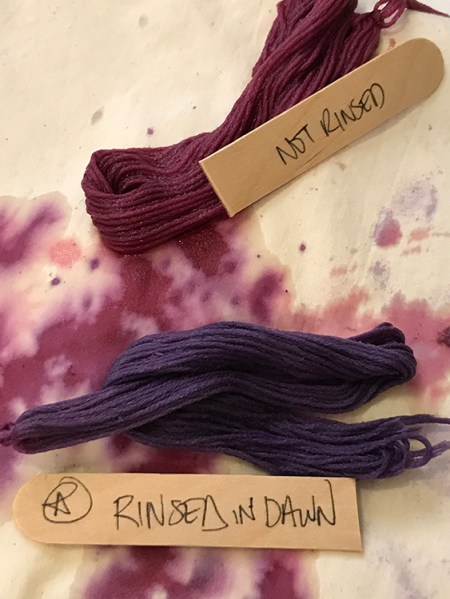
While it’s nothing like rocket science, there’s certainly a lot of factors that go into how the dye turns out. Some things (like berries) need a salt fixative, some dyes will change color with the addition of an acid (like vinegar) or a base (like cream of tartar), and some things don’t even need to be boiled at all (like black beans). Even the way you rinse your dyes can impact the color!
The good news is, if you’re not really adamant about obtaining a specific result or will need to be able to remake a given dye at some point in the future with any accuracy – it really doesn’t matter if you screw something up because it’s likely you’ll still get a dyed something or other out of the process and you’ll probably be quite happy with it regardless.
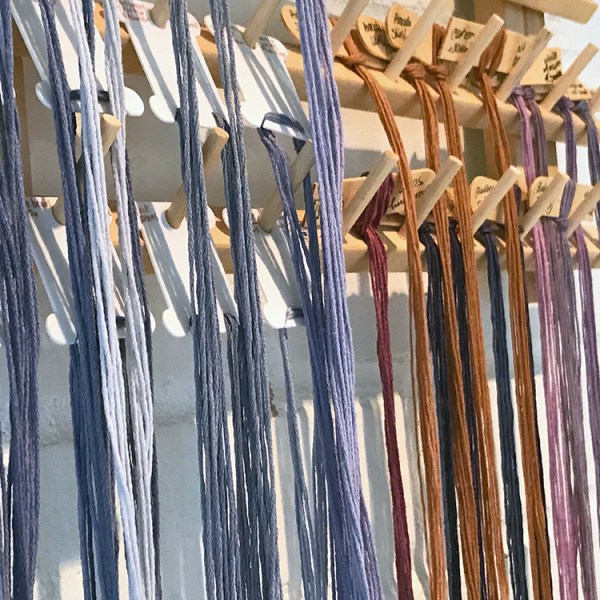
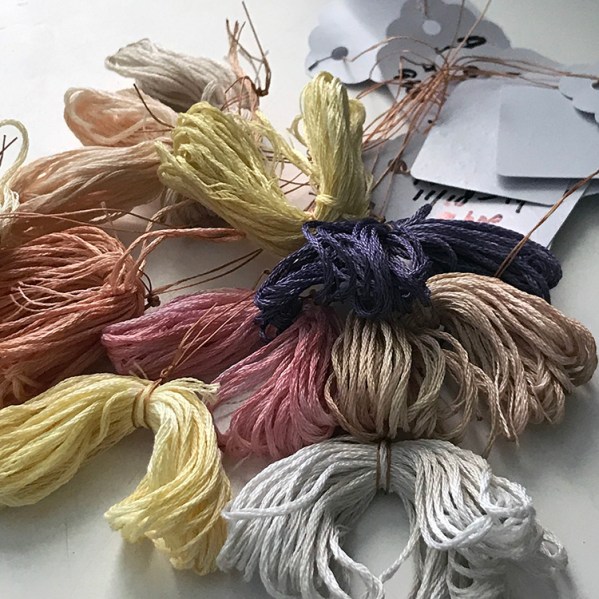

For me, I want to be able to recreate anything I happen to like so I’m working to keep excellent notes for each and every recipe I create and document the outcome for reference later on. The result is a handy little dye sample catalog ** (pictured above, with studio cat) that is steadily growing each week. I’m having way too much fun with this.
So, do you want to try it out? Here’s what do you need to get started and some basic tips and links for how to use food-safe items to make some nifty home-dyed embroidery floss in your kitchen. (Of course, you can dye anything and cotton isn’t one of the easier choices so many prefer dying wool or silk for better results).
Tools and stuff:
- A pot to boil stuff in – a small sauce pan is fine. A stainless steel or enamel pot is recommended. If you’re using cast iron or copper the metal will impact your dye color. *
- Stuff to prep your items with if necessary. You know, knives, cutting boards, something to stir with.
- Some cheese cloth or panty hose to strain stuff (like seeds) from you dye mixture.
- Jars to store (and dye) your stuff in. Save your empty pasta or salsa jars or buy a cheap pack of mason jars used for canning (around $8 for 12 this time of year in Wal-Mart and Target).
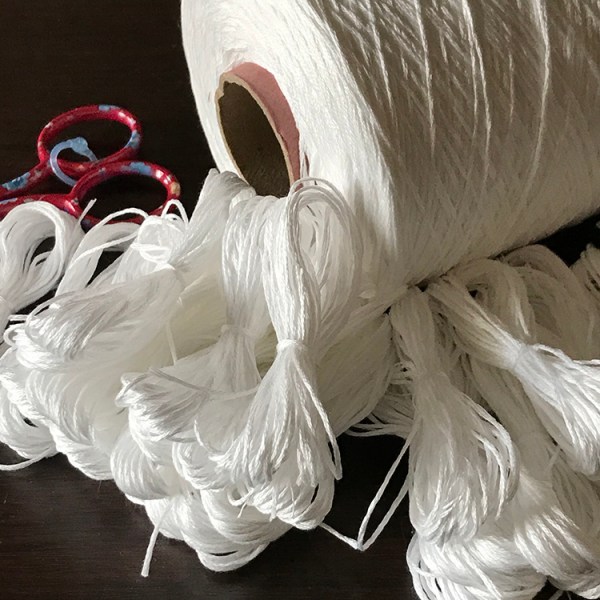
- 100% cotton embroidery floss in white and/or beige. You can over-dye other colors too to make them look more natural but as some dyes are rather light I’d recommend avoiding darker colors. Don’t get a poly-blend floss – it won’t hold the dye even if treated.
- Alum – optional (but highly recommended) – this is used for canning, can be found with the spices in grocery stores. What is this an why would you need it? Alum is used as a mordant to help prep your fibers so that the dye will adhere to them better ahead of time. While not essential, it yields better results and can also impact both your fruit dyes and veggie dyes from time to time.
- Vinegar & Cream of Tarter – optional acid and base for fun experiments.
Basic “everyday” kitchen items that can make good dyes:
- Avocado (skins and pits, cleaned of meat): Makes oranges, golds, and pale pinks
- Blackberries: Makes a nice blue-violet
- Blueberries: Makes a more violet color that verges on periwinkle
- Black beans: Makes blues in shades of grey and sometimes green – this is a cold dye situation meaning that there’s no boiling involved so it’s pretty much as simple as setting some beans to soak overnight (and then you can cook and eat the beans so there’s no waste!)
- Spinach: Makes yellows, greens, and browns (depending on how you do it).
- Turmeric (powder is fine but if you have the roots it’s much better in my opinion): Makes yellow.
- Pomegranate (husk, eat the seeds while you make the dye): Makes goldish reddish brown that’s quite lovely.
- Onion Skins: A variety of colors from yellow, red, brown and even green.
- Tea and coffee: All kinds of colors depending on type.
- Cabbage: ALL THE COLORS (with different acid and base additives to the dye)
Some key tips:
- Scour Power!!! Clean what you’ll be dying the right way – called “scouring“! Don’t use something straight out of the dryer – the laundry soap and fabric softener will prevent dyes from reaching and latching onto fibers.
- Research your dye stuff. Do your research on each specific item you’re making a dye from… it’s not like you have spend hours doing this but make yourself a cup of tea and go on Pinterest for the length of time it takes you to sip it and you’ll know a great deal of useful information. (Then dye stuff with the rest of your tea, if there is any…)
- Not all dye stuff needs to be (or should be) boiled. Some stuff can just be thrown in a jar with water and left alone for awhile. Research will let you know if this is advised or not.
- Don’t boil the crap out of things that do need to be cooked… high heat for extended times is not ideal for most dye items. Just bring to a boil and simmer for a length of time. Sometimes it matters how long this goes on and sometimes it doesn’t.
- Everything matters. Don’t underestimate the impact that each little thing can have… pot metal, time at a certain heat, prep of fabric, mordants used, type of material dyed, acid level, rinse method, exposure to air, drying, etc. can all impact your color. If you’re trying to be specific take note and think things through.
- Keep Notes: Even if you don’t really plan on repeating stuff, take notes because you can refer back to this in the future when it comes to other things and even give you ideas of what to try.
* Regrettably necessary disclaimer: I’m only advocating using dye stuffs and mordants that you already cook with and/or consume as this will be unlikely to contaminate your cook-ware or utensils. Although many sites talk about using other things (like iron mordants) and are adamant about using separate materials for dying (and not working in your kitchen at all), when it comes to food safe items my personal opinion is that if you’d cook it and eat it, cooking it and dying with it isn’t much different. So (to me) using the same stuff I cook with is fine. Of course, you have to make your own choices and I am in no way responsible or liable for anything that happens to you based on your choices even if you were inspired by what you read here on my site or on the sites I’ve linked in this post.
** Dye Catalog: I plan on releasing information specifically about my dye catalog as well as a free downloadable PDF by the end of the year that you can use to print your own catalog pages to keep track of your own stuff.
*** Affiliation: I’m not affiliated with anyone or any website – all opinions and reviews are my own. I do not receive any benefits from linking to products that I share in my posts.

This is so interesting, I did some natural dying years ago with Australian native plants and lichens, lots of fun. I look forward to seeing. Ire of your work. Karen
Thank you, Karen. I appreciate the comment and apologize for not responding sooner. I somehow missed a ton of comments from November and December so wanted to take a moment to follow up – your own botanical work is really beautiful.
I’m learning a lot from this post, but I want to add that your drying rack is brilliantly simple. I don’t like the plastic bobbin cards much, as for me the thread ends don’t seem to stick in them as safely as in the paper ones, but of course I have a stash of the plastic ones that came with the storage boxes ….
Thank you! That’s kind of you to say. It is important to find the supplies that work for you personally. I’d love to try wooden bobbins because I’ve seen a lot of nice ones and wonder if the wood would help secure the ends like the paper bobbins due but with more stability. There are so many options – I hope you find the right ones for you.